 Over the past few years, trading the once popular popcorn ceiling for a more polished look has been a common trend among homeowners. Many homeowners have opted for sleeker finishes, and some are now creating statement ceilings with bold textures, colors, and designs. You may be surprised how much changing the ceiling can transform the look of the whole room. If you have wanted to renovate your ceiling but have been intimidated by the idea of removing your popcorn ceiling, here are some tips to ease your nerves.
The first thing to think about if you are considering removing the popcorn texture from your ceiling is the potential of asbestos and the risks it holds. If your popcorn ceiling was installed before the mid 1980s, it could contain asbestos. For safety, you should seriously consider hiring a professional to remove a sample and have an accredited lab test it for the harmful material. It is possible for homeowners to safely collect a sample for testing, but it is always safer to hire a professional who knows exactly what safety precautions to take. If the sample tests positive for asbestos, it is recommended to leave the substance alone since it causes harm when disturbed and its dust is inhaled. However, there are options for changing the look of your ceiling without disturbing the asbestos, including encapsulating and covering the ceiling. If you are still set on removing it, hire an asbestos abatement professional to do the job.
If the sample tests negative for asbestos and you want to tackle the project yourself, you will need the right tools and enough time to complete the project. There are two options for removal: dry or wet. Either way, you will need a ladder, a scraper, and a sander with an extension pole. You can attempt each method on a small area to see which will work best for you. The wet method involves spraying the ceiling with water to soften the material before scraping. This technique may make the scraping easier but will likely make clean up harder. Also, water may not penetrate painted popcorn ceilings and could result in a messy clean up without making the scraping any easier. If you choose to use water, you will need a water sprayer and a mud pan. For the dry method, consider investing in a shop-vac for easier clean up. With either option, you should use disposable drop cloths to cover the area you’re working in. Regardless of the method you choose, wear a protective eye covering and dust mask for safety.
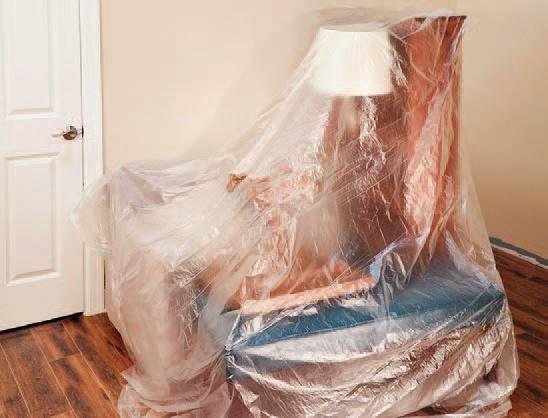 Step number one for completing this project yourself is the preparation and set up of your work space. First, remove as many items as you can from the room where you will be working. Use disposable drop cloths to cover any unmoved furniture pieces and the floor. To ensure complete coverage, you may want to tape the drop cloths to the baseboards; this would be especially helpful if you’re using the wet method. Covering the walls with the drop cloths can also make clean up easier. Next, turn off the power to the room, and remove all fixtures from the ceiling. Cover recessed lights, electrical boxes, and outlets with plastic and/or tape. Gather your required tools, and sand the corners of the scraper to avoid gouging the ceiling.
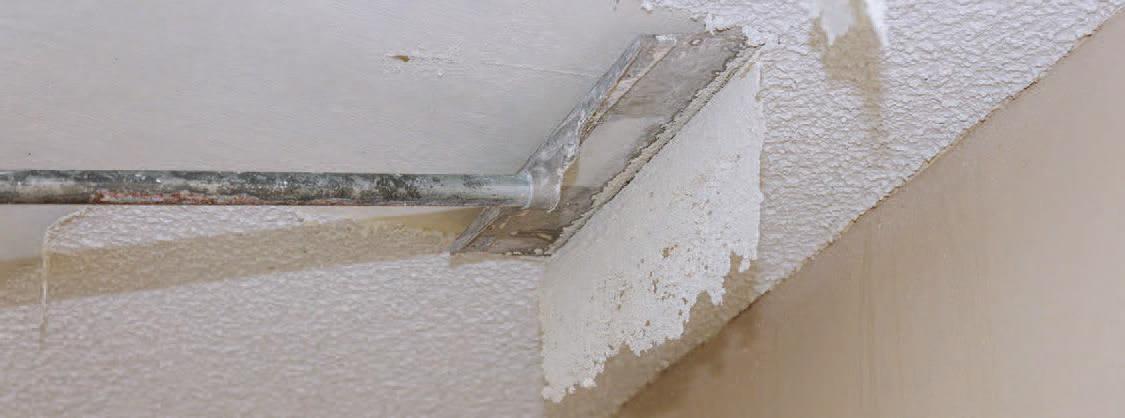
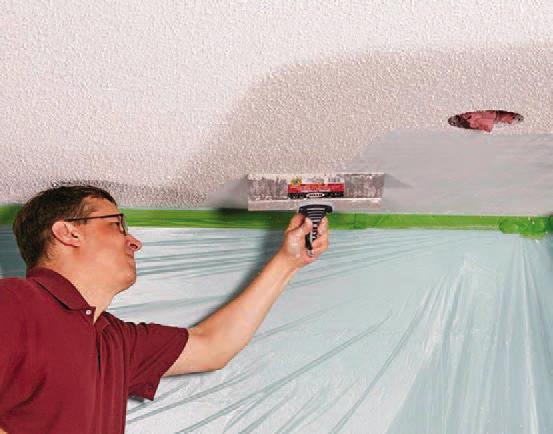
Once everything is covered and your tools are secured, pick a corner of the room, and get to work. Focus on small sections at a time. If you spray too large of an area, spots may dry before you are able to scrape them. Be careful not to over saturate the ceiling to avoid damage to the ceiling behind the popcorn texture. Wait about ten to fifteen minutes after spraying to allow the water to soak into the texture and loosen it, and then scrape the section you sprayed. Once you’ve scraped the popcorn texture off the ceiling, fill in any holes, and sand the ceiling for a smooth finish. A smooth surface will be necessary if you plan to paint your ceiling after removing the popcorn texture. Small imperfections may be covered by wallpaper, but paint will not help cover up rough patches and will make your painting step more difficult.
 When you are sure you have removed all of the popcorn texture, fold up the drop cloths, and discard them. Use a shop-vac to remove any dust that escaped from the drop cloths. If you are going to paint your ceiling, you’ll need to cover the room again. Taking the time to remove the used drop cloths and put up new ones will help prevent dust getting into the fresh wet paint. If you chose the wet method, new drop cloths will also stop you from stepping in the wet ceiling texture you just removed and spreading it around with your shoes. Next, paint or apply wallpaper as desired. Replace any moved furniture, and enjoy the new look of your ceiling.
If you are not up to tackling this project yourself or do not want to disturb asbestos-containing material, there are still a few options for you to give your ceiling a makeover. You can cover your existing ceiling with panels, planks, bead board, metal tiles, etc. Adding new drywall to create a new texture on top of the popcorn is also an option. If you opt for covering instead of removing because your ceiling contains asbestos, it is always best to hire a professional. Asbestos abatement professionals can encapsulate the material, and you can then cover your ceiling for a new look.
There are many options for updating your ceiling. Before you begin, consider having your ceiling tested for asbestos. If you decide to remove the popcorn texture yourself, gather the tools you need, prepare the area, and get to work. Whether you remove the popcorn texture or cover it, enjoy the look of a nice, new ceiling in the end. ![]()
Kimberly McMahon
Home & Yard Magazine