One of the realities of life in Florida is unpredictable hurricane seasons and a higher overall frequency of storms in general compared to most other places in the U.S. Because of this, you need to be prepared for when storm damage occurs. Having a plan of action put together can save you time and money because you can often stop a problem from becoming worse if you act quickly. Roof damage is one of the most common results of storms that homeowners have to deal with in Florida, so it is crucial that you know what to do if and when damage occurs.
Safety First
If your roof is damaged, your first thought might be to hurry and cover the damage with tarp as soon as possible. Trying to apply tarp to your roof without taking any precautions, however, can be risky and lead to injury. This is why you should make sure you’re proceeding with caution. A few tips for approaching tarping your roof safely include:
- Wait until the weather has cleared before you attempt any repairs. Storms in Florida, especially during hurricane season, can often be life-threatening. Repairs should always wait until any bad weather has subsided.
- Don’t attempt to climb onto the roof if it is slippery, unstable, or steep. Also, once you have the tarp down, don’t attempt to stand on the tarp, as it can be slippery as well as unstable due to the damage underneath. If you’re unsure about the safety of standing on your roof when assessing any damage, stay on the ladder to keep yourself safe, and contact a professional.
- Invest in safety equipment. Hard hats and eye protection are readily available on the market and can offer protection from falling objects, such as branches.
- Use teamwork if possible. As with most repairs, a second set of eyes can create a safer atmosphere, so work with another person on the roof repair if possible. If you don’t have someone available to help you with the repair, consult a professional if the job seems unnecessarily risky to perform alone.
Assessing Damage
The first thing you’ll want to do after taking safety precautions is clear the roof of any loose debris, such as branches and leaves, so that you can better assess the situation. After you’ve cleared the area of debris, look for any damaged areas that will require tarping. If you see an area that will require tarp work, measure the size of the damaged area using a tape measure so that you will know how big of a tarp you’ll need to cover the damage. In most cases, any heavy-duty tarp that you already have should be big enough for the job. However, the measurements you take of the roof damage will help you decide if you need to purchase a larger tarp. During this phase, make note of any other safety hazards located on the roof, such as vent stacks and satellite dishes as well as skylights and openings that might not be as obvious once they have been tarped over. Never cover vents for appliances that use natural or propane gas, fireplaces, water heaters, and furnaces, as the tarp could back up carbon monoxide into the home, which can be a major health hazard. Cut openings in your tarp for any gas-releasing vents. Making mental note of where obstacles are located and adapting to them will help you stay safe through the completion of the job. You may also want to label areas, such as where skylights are under the tarp, to make it easier to remember, especially if you will be having a professional work on the roof.
What You’ll Need
 Once you’ve made the required measurements of any roof damage, you’ll want to get together the materials you’ll need for the repairs. If you have a large hole in your roof, you will want to cover it with a sheet of plywood, which should be at least ½-inch thick. Next, you’ll need a heavy-duty tarp to prevent water from reaching the affected area. The tarp you choose should allow for at least 3 feet of excess tarp on each side of the damage while also allowing for at least 4 feet of overhang over the peak of the roof. A tarp with UV inhibitors can hold up longer than one without them, giving you more time for repairs to be made. You will also need 2×4 planks to secure the edges of the tarp as well as a hammer, 3¼-inch nails, a drill, and screws. You’ll also need a saw to cut the 2x4s and plywood to the correct lengths required for the repair.
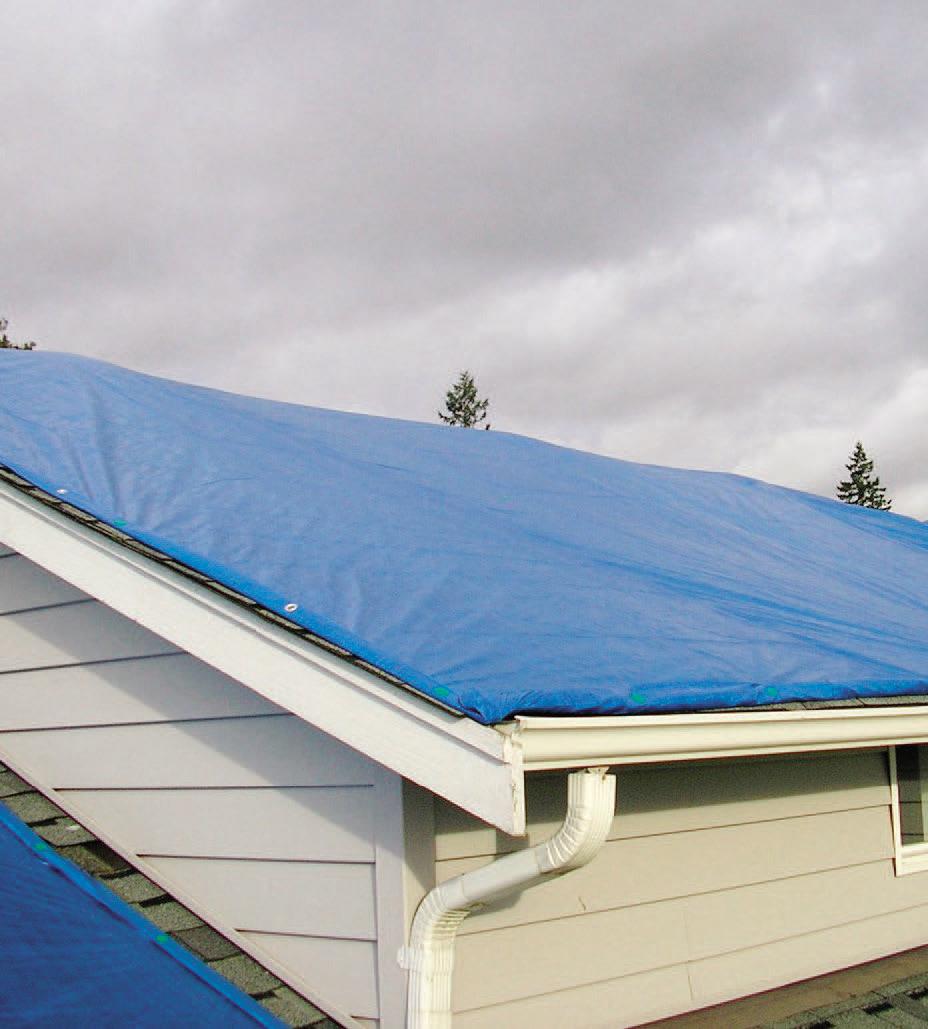
Applying Your Tarp
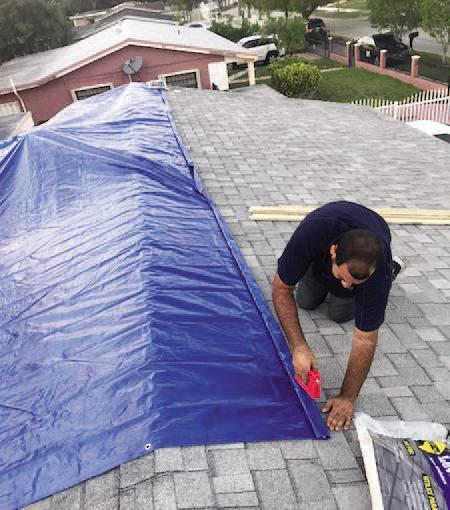 Now that you have the appropriate supplies put together, you’re ready to tackle the repair job. Taking care to avoid stepping on a hazardous part of the roof, cover any large holes with plywood sheets, if applicable, and screw them down into the surrounding roof to prevent water from pooling into the hole. Once you have done that, it’s time to move on to the tarp. Unroll your tarp over the damaged area, making sure that you have at least 4 feet laying on the other side of your roof’s peak. It’s okay to have excess tarp on this side of the roof, and it can hang off the eave if need be. Place a 2×4 under the bottom edge of the tarp on the damaged side of your roof, allowing for a foot of 2×4 to stick out from under the tarp on each side. Secure the tarp to the 2×4 using a hammer and nails before you proceed. Roll excess tarp around the 2×4 until the tarp is covering just the damaged area, and then screw the 2×4 into your roof to further secure it. After you’ve done that, secure the sides of the tarp using 2x4s screwed into your roof before moving on to the edge of the tarp that is hanging off the eave. Do the same on this side of the tarp, rolling the excess material around a 2×4 and securing it to your house so that the tarp will remain secure and withstand any rain. After you’ve done this, look for any areas that could use further reinforcement via more secured 2x4s screwed into your roof. If the tarp seems secure, you’ve successfully tarped your damaged roof.
 Once you’ve finished the tarping, make sure to clear the roof and surrounding ground of screws, nails, and anything you may have dropped during the process. This will make it safer and easier for whoever is performing repairs to get the job done and get your roof back in order. One of the most important things to remember is that you should never attempt work on your roof if you feel like you may be unable to complete it safely. Whether due to hazardous conditions or physical limitations, sometimes the best answer is to consult a professional. Only perform a repair such as this if you are confident that you can do so in a safe manner. Tarp repairs are typically only recommended to be depended on for a few months until you can get your roof properly repaired, and sooner is definitely better. While tarp repairs protect your home from most water damage, you will not see the same energy efficiency and water resistance in your home until you get your roof fully fixed, so get that done as soon as possible!
 ![]()
Kent Carson
Home & Yard Magazine